
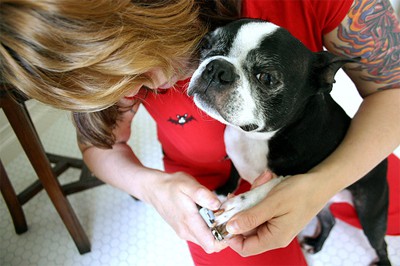
Image taken from www.diydoggrooming.com
Nail clipping has to be one of the most feared elements of grooming around. Neither owners nor dogs particularly like doing it or having it done but this is for very different reasons.
Dogs do not like having their nails clipped because it feels strange. If you think about having your own nails cut, the sensation is more than a little odd.
However, owners do not like clipping their dogs’ nails purely and simply because they know the risks.
If you know what they are though and find out exactly how to clip nails then you will find that it becomes second nature within just a few grooming sessions.
Knowing exactly how to cut your dog’s nails is an absolute must and getting the technique right is incredibly important. This is why a complete step by step guide must be adhered to at all times. However, you might want to know a little more about the nails before you clip them.
Not only will this knowledge help you to understand how to clip nails but it will also reinforce why you should because there are serious consequences if you do not do so.
PREPARING TO CLIP YOUR DOG’S NAILS
Preparing to clip your dog’s nails is an easy process but it can be even easier if you get the timing right. The earlier you clip your dog’s nails the better. Clipping a puppy’s nails may be a chore because of the inevitable reaction that you have when doing any element of grooming to your puppy.
However, getting him or her used to having nails clipped early on will really help to give the process a little acceptance, which can turn into an offering of the paw at a later date!
Regardless of how old your dog is, the first thing you need to do to get your dog used to having his or her paws touched. It is true that most dogs hate that but there is no way around holding his or her paws when you trim the nails. Try stroking the paws after asking your dog for them.
Most dogs can be taught to give you their paw quickly and easily with a few treats and this will help to secure acceptance. When you can touch the paws freely without any resistance, start to squeeze the individual toes and nails lightly so they get used to that feeling. Again, be sure to reward them for their good behaviour and acceptance.
Your demeanour will undoubtedly help to make the process that little bit easier. You can actively relax into the process if you have faith in yourself and your dog will give you exactly the same thing back.
However, if you still feel a little ill at ease with the process then ask a professional dog groomer or vet if you can sit in on a nail clipping session to see how it should be done. This is also a good idea for safety purposes as well as your own peace of mind.
When you are comfortable with the idea of clipping your dog’s nails then you may want to get all of the equipment that you will need for this element of grooming together. Believe it or not, there are so many types of clippers available out there that it is very difficult to choose between them.
There are three main types available and they come in an array of sizes so that you can choose the right one for the breed and nail type that comes along with it. You can choose the scissors clippers, which are suitable primarily for small dogs.
The guillotine clippers are primarily designed for use on medium dogs. The heavy duty clippers that resemble pliers are those for use with large dogs given that this size is well known for its strong and resistant nails.
You may actually want to add to the pair of clippers you choose with a dremel tool, which is essentially a nail file for dogs. It is commonly used to file any rough edges that are left after clipping is finished. This is an extremely good idea because your dog uses those nails for scratching and may well cause harm to him or herself afterwards.
However, another way of doing this may well prove to be more popular – taking your dog for a walk on a hard surface like the sidewalk afterwards. This will also get rid of any rough edges quickly and easily.
The final piece of all dog grooming tools you need is there just in case you ever cut your dog’s nails a little too close for comfort. You may need a styptic pen or powder to hand to stop any bleeding if you cut the quick. There will be a little more about that in a moment but you should always have this tool to hand just in case.
CLIPPING YOUR DOG’S NAILS: THE PROCESS
There is only one golden rule when clipping your dog’s nails and that is always make sure that they are not touching the ground when your dog stands up. Nails should never touch the ground. As such, you should look at where the nails need to be cut to for this to occur when you clip them for the very first time and go from there.
The step by step nail clipping process is outlined for you right here so you can follow it perfectly and ensure that you clip your dog’s nails properly first time, every time!
- Always sit on the floor with your dog when you are clipping his or her nails because this will give you the best viewpoint to take a look at the nails properly and give you a little leverage so that you cannot be thrown off balance if your dog does decide to struggle for whatever reason.
- When you are ready to trim, grasp your dog’s paw in your hand and wait until any struggling subsides. Place your trimmer around the nail and the cut at a 45 degree angle. Make sure that the trimmer is well below the quick when you do so, trimming off a little at a time right on the end of the nail.If you do it little by little then it will be easier to control. Keep an eye on the quick and ensure that you are not going to cut it for each and every little piece that you take out of the nail.
- If the nail seems to splinter when you cut it, do not panic because it is not your fault. Nails do get brittle from time to time and splintering of the nail is relatively normal. Use a file to take the edge off any rough splinters that remain on the nail, sweeping downwards with each stroke and following the curve on the back of the nail.
- Do one paw at a time and gage your dog’s mood each time you have finished a paw. He or she may let you do all four at the same time but if you do not then you should take a break and come back to those not done a little later on.
- When all four paws are done, move on to the dew claws. If you do not then it is the dog’s equivalent of an in-growing toe nail. Trim those in much the same way as you have done the other nails ad ensure that the edge is not too sharp so as to cut your dog when or she scratches around the eye.
There is one point of note that you will be able to benefit from in the future when you are used to cutting your dog’s nails though – as you start clipping your dog’s nails more and more, the quick will begin to recede. In this way, dog claws are like human nails.
As such, eventually your dog will not need his or her nails clipping because the blood supply receding will ensure that they do not grow as long as they used to. No matter how much you love or hate clipping nails in the meantime, just remember that it is what is best for your dog that counts.
It really is that easy! All you have to do is take your time and not panic. Just be sure to trim the nails little and often to ensure that they stay short and are in the best condition possible. You should also make sure that your clippers are sharp.
After all, if they are blunt then they are far more likely to hurt your dog and put him or her off the process for life. Furthermore, if they are of a high quality then they will last for years so take care of them and they will take care of your dog.
CUTTING THE QUICK
Cutting the quick is an owner’s worst dog grooming nightmare because it can hurt your dog and thus make you feel awful for months to come. However, it happens to the best of us no matter how long grooming a dog has been a weekly or monthly routine. As such, if it does happen the key is not to panic but just to deal with it.
Clipping the quick as well as the nail will hurt your dog and it will most definitely bleed. As such, you just have to be prepared to cope with the occurrence as and when it happens. Providing that you have everything you need to hand then it will not be as much of a big deal as you expect and the bleeding will stop within just a few moments.
The only exception to this is if you take too much off the quick and then have to take your dog to a vet to stem the bleeding. The vet will be able to help you but it will be so much better if you can help yourself so that your dog sees it as no big deal.
You have three different options when it comes to cutting the quick, and the one you decide on is completely up to you. However, before going through them, taking a proactive approach is the best way because then your dog will feel your calm and respond accordingly.
The first option is to just let the quick bleed and wait until it clots and stops bleeding naturally. This can take up to 5 minutes or so and that can seem like forever when your dog is bleeding.
However, there are drawbacks to this method. Your dog will try to lick the wound and this can prolong the bleeding and cause infection. Your dog will also probably refuse to sit still and so you get blood all over your home.
Furthermore, if the bleeding last for longer than 7 minutes then you will have to go see a vet immediately to get a little help.
The second method is to simply cover the wound with a little tissue and then apply a little corn flour to the area to help stop the bleeding. Again, that can cause a lot of mess.
However, the third option is much the same except it requires that you use a styptic pen to stop the bleeding. This will stop it instantly and does not harm or even cause your dog pain in any way at all. As such, this is easily the best method around at the moment.
Finally, just one last tip to help you during dog grooming. Always check your dog’s paws out thoroughly when you are cutting the nails. You need to check the pads to make sure that they are intact and not stuck with thorns, glass or other foreign objects. Make sure that your dog has healthy paws and then you will happily be able to leave them alone until trim time rolls around again.